If you have already installed fldigi and flmsg, as well as configured them, You are now ready to start transmitting and receiving with Fldigi. For this tutorial we will be using the acoustic coupling method and will be using the MT63-2000L mode.
Transmitting
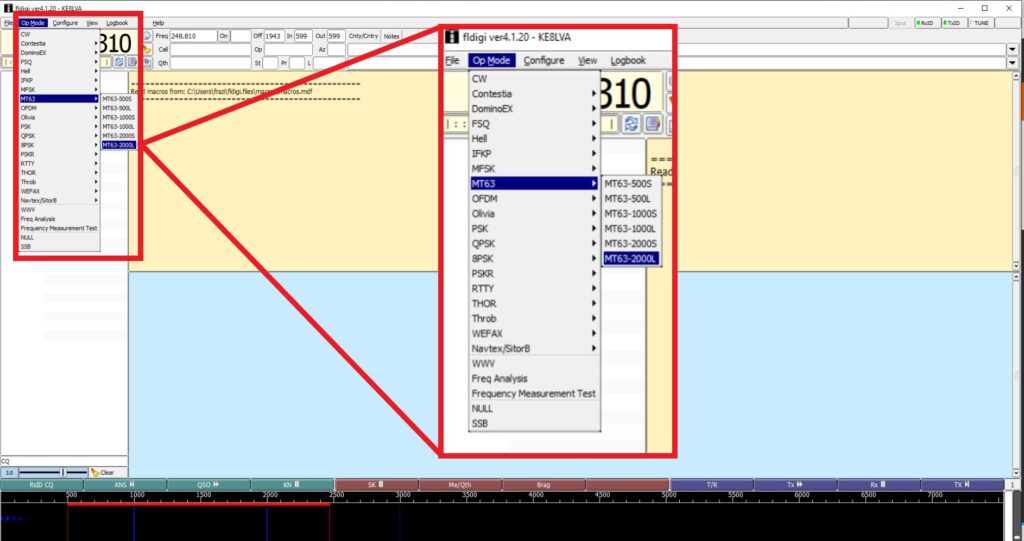
First, you need to open Fldigi and make sure you are operating in the correct mode. On the top left corner of the screen go to Op Mode, then down to MT63, then select MT63-2000L.
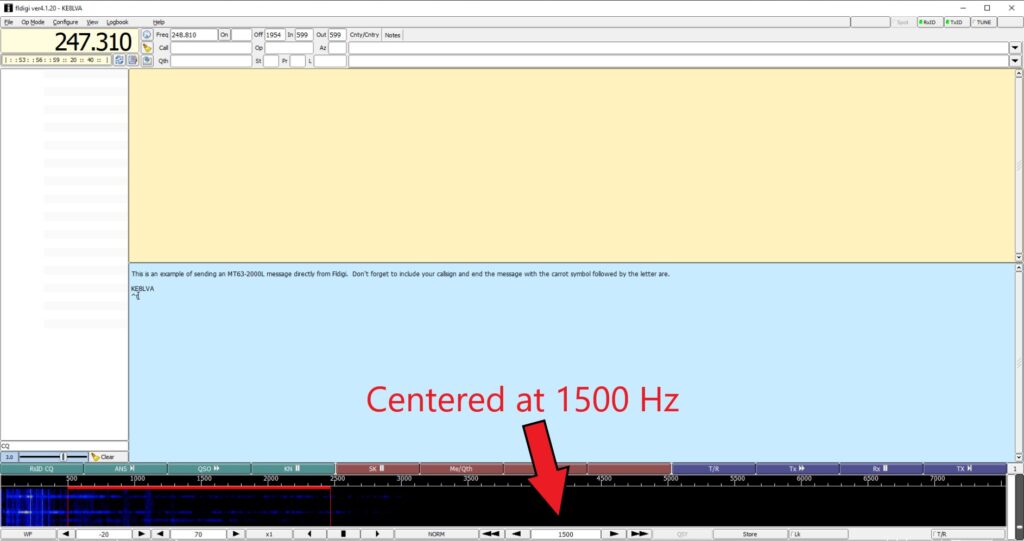
Be sure that you are centered at 1500 Hz. If you followed our MT63 configuration you should be. You can see where you are centered at the bottom of your screen. If not adjust it with the arrows, click in the waterfall, or the best way would be to change it in the settings as outlined in our MT63 configuration page.
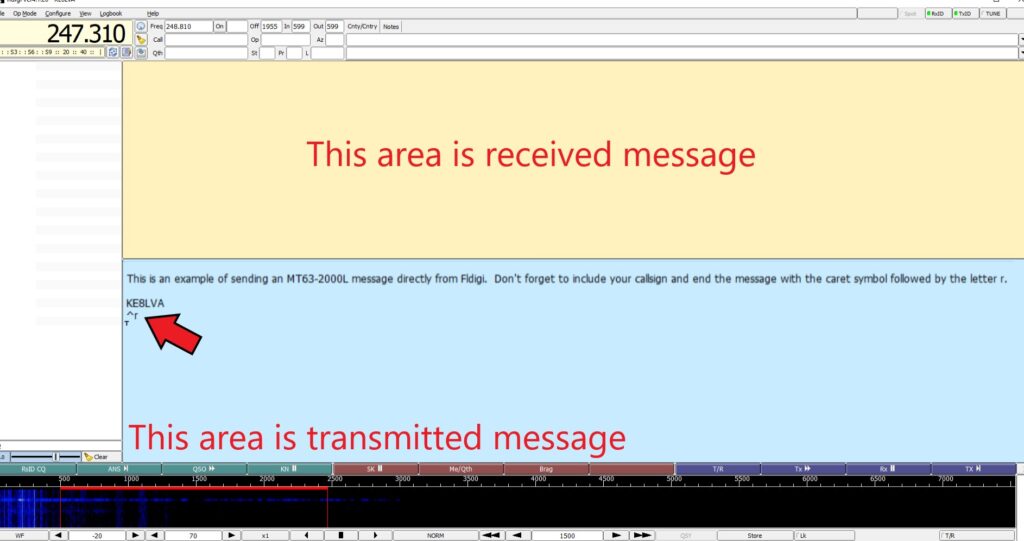
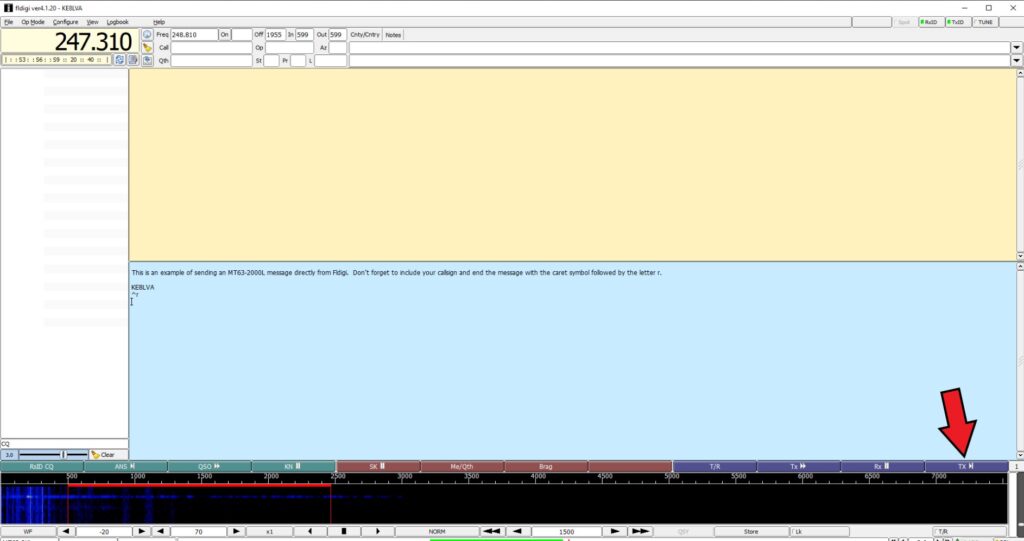
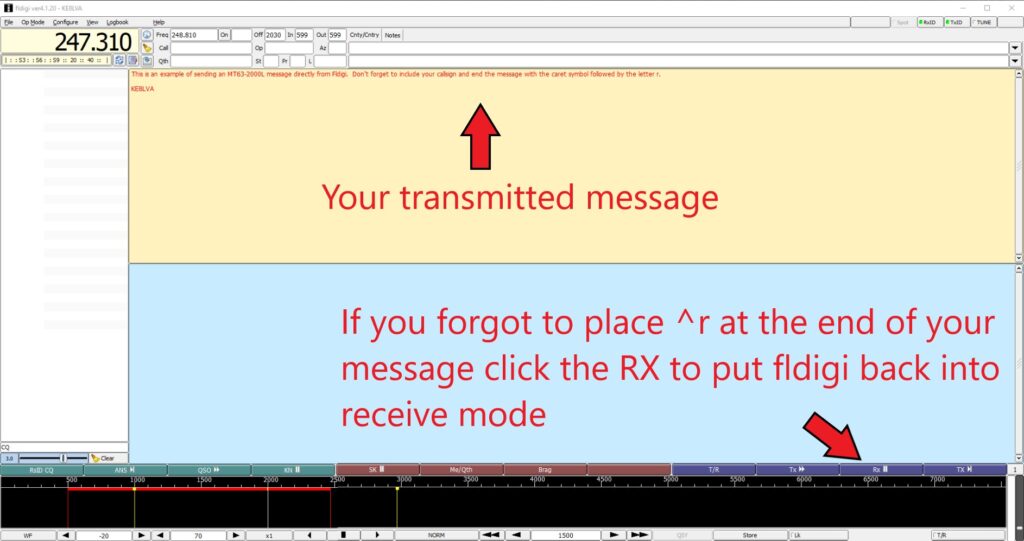
To simply send a message not using a form, type your message in the blue pane on the lower portion of the screen. At the end of your message, to have fldigi automatically stop transmitting audio and put fldigi back into receive mode, place the caret symbol ^ followed by an r like pictured below. If you are wanting to send a message using a form, you can find instructions to do that here.
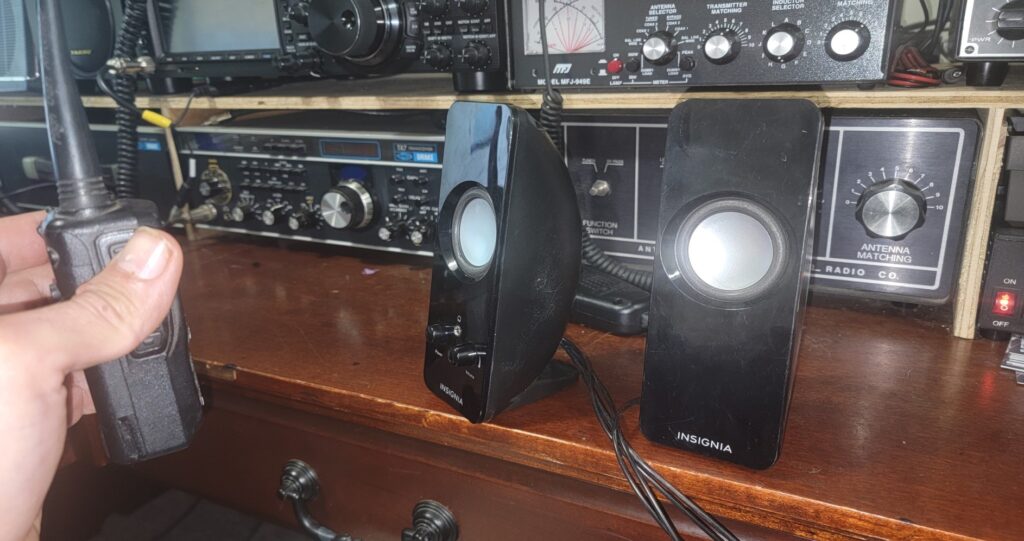
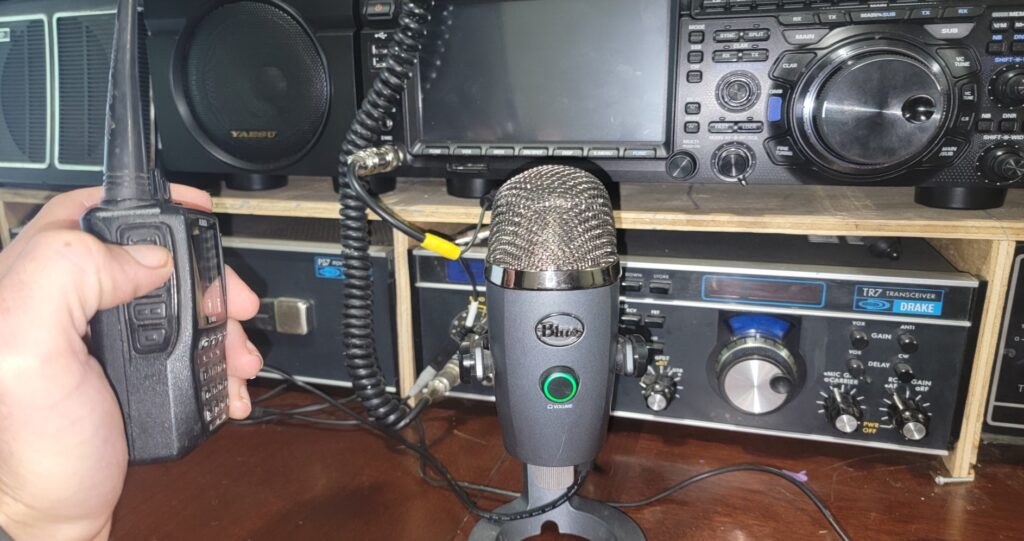
Once you have finished typing your message, hold your radio microphone 3-12 inches from your computer speakers. You will want to make sure to press the PTT for at least one second prior to pushing TX in fldigi. If you are doing it over a repeater you may need to hold the PTT slightly longer to allow enough time for the repeater to key up without cutting off the beginning of your transmission. Once ready click the TX button on the bottom right of the Fldigi screen. Once your message has completed, if you remembered to put ^r at the end of your message, fldigi will switch back to receive mode. Allow one to two seconds after the message has completed then release your PTT.
While transmitting the message, it will show up in the upper screen for received messages. If for some reason you forgot to place the ^r at the end of your message and fldigi does not stop transmitting, dont worry. Once your entire message appears in the top screen you can simply click the RX button on the lower right corner of your screen to put fldigi back into receive mode.
That’s it! Hopefully you have successfully transmitted your first Fldigi message. Below you will find instructions on receiving Fldigi.
Receiving
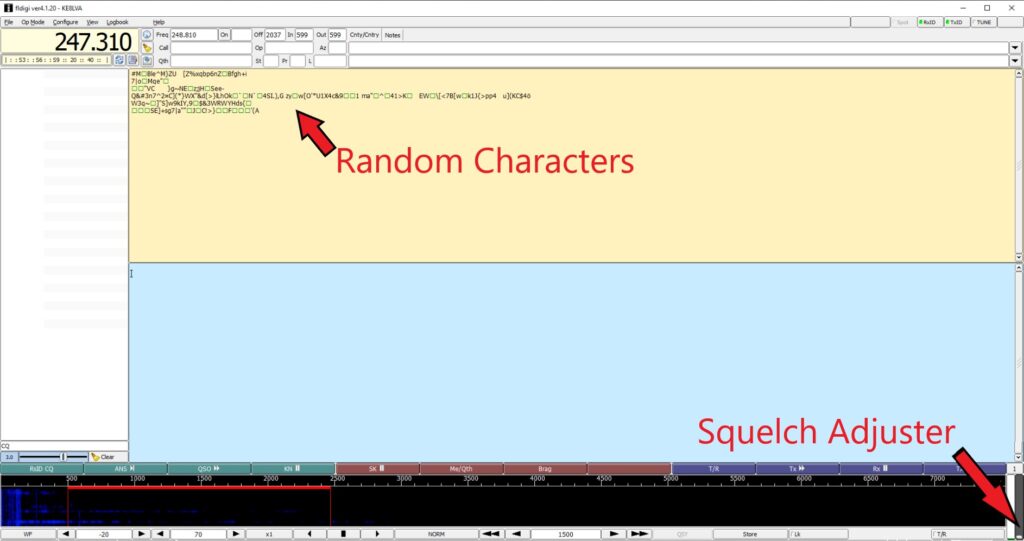
Receiving an fldigi message is very simple. First, make sure you are in the right mode (MT63) like described above. If you notice a bunch of random characters appearing, adjust the squelch slider until they stop. It is located on the bottom right of the screen.
On the bottom of your screen make sure the red receive bandwidth box is centered at 1500 Hz. This is the standard we use as well as many others. You can change this in your settings. You can also click at 1500 Hz, or adjust it in the box to the bottom right of the waterfall. Best practice is to set it in the configuration as outlined here.
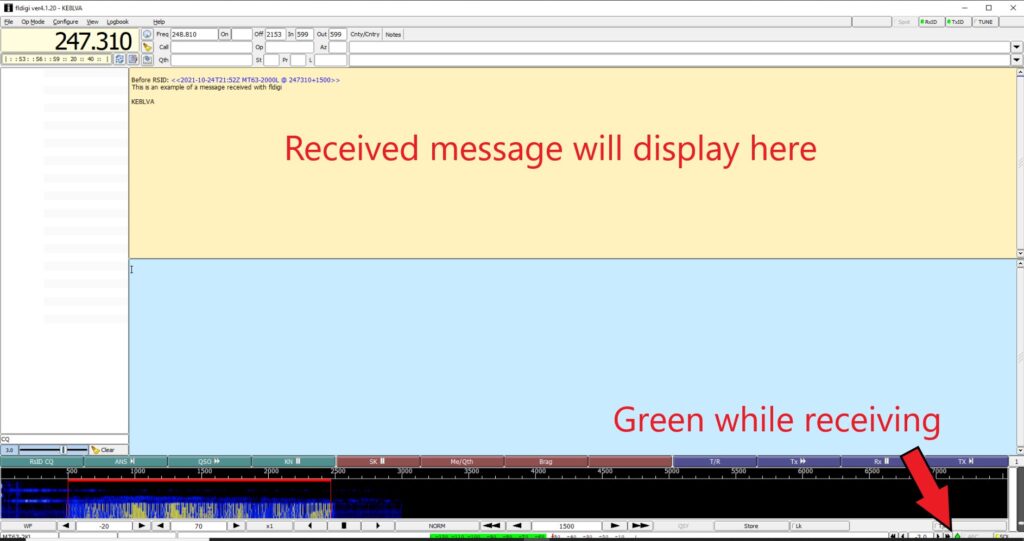
Now hold your radio speaker 3-12 inches from your computer microphone. As the message is decoded it will appear in the upper portion of the Fldigi screen. As you are receiving watch the diamond beside the AFC in the lower right corner of your screen. Ideally this will stay green while you are receiving. If its yellow it is slightly being over driven but still usable. If it is red it is way over driven. You need to adjust either your radio volume or distance from the microphone until it is green.
You’re done!
Hopefully you have successfully decoded your first fldigi MT63-2000L message. If you notice some random characters between the RSID and the received message, adjust the RSID squelch open time. I have found decreasing it to 3 seconds has worked for me. You can find the instructions to do that here.
If you had any trouble with transmitting and receiving with fldigi contact us. If you are using a laptop you could also bring it to the next club meeting to get help. You can also review the fldigi user manual if you had any problems with transmitting and receiving with fldigi.

