Configuring Flmsg for windows is really simple. There are only a few steps we will need to take to have it up and running.
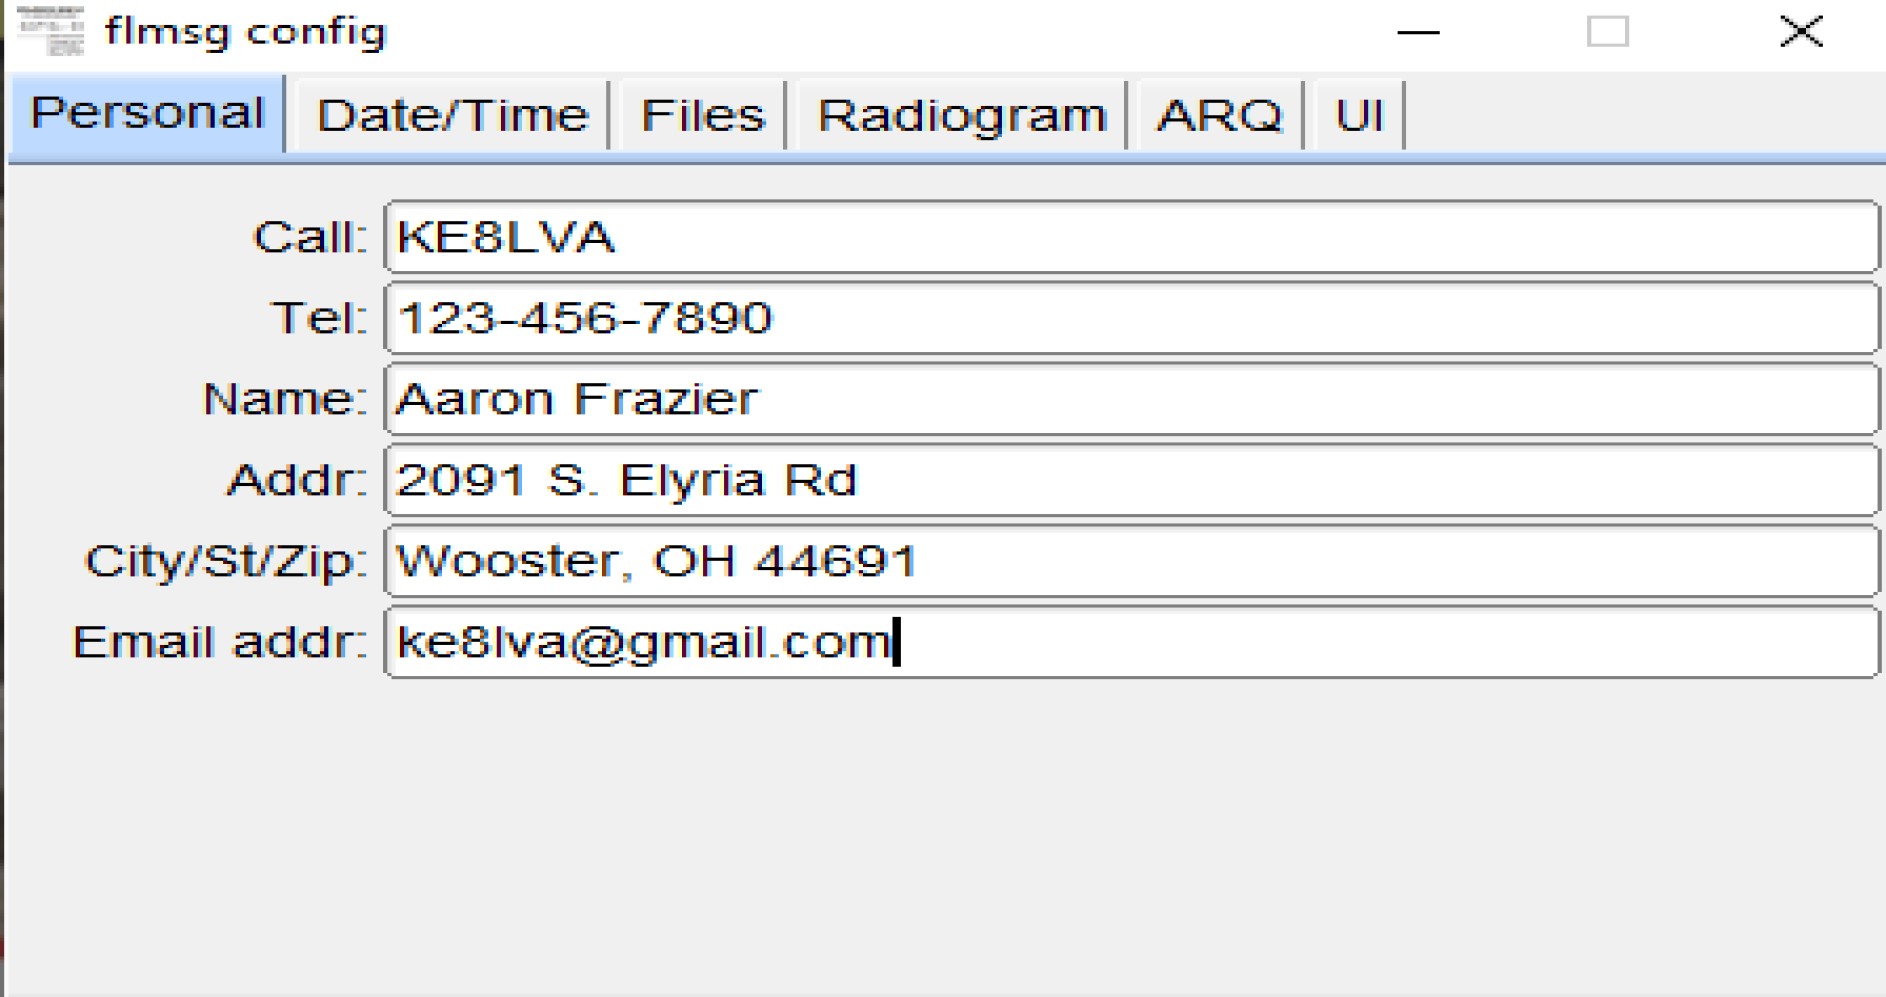
First we will want to open Flmsg. When you downloaded and installed flmsg, it should have placed a shortcut on your desktop. When opened for the first time it will ask you if you want to use the simple version or the expert version. I prefer to use the expert version so that is what this how to will show. After selecting expert two boxes will open. Under the personal tab, you just have to fill out your information. This is information that other stations will receive when you send them a message so you will want to be sure to fill it out.
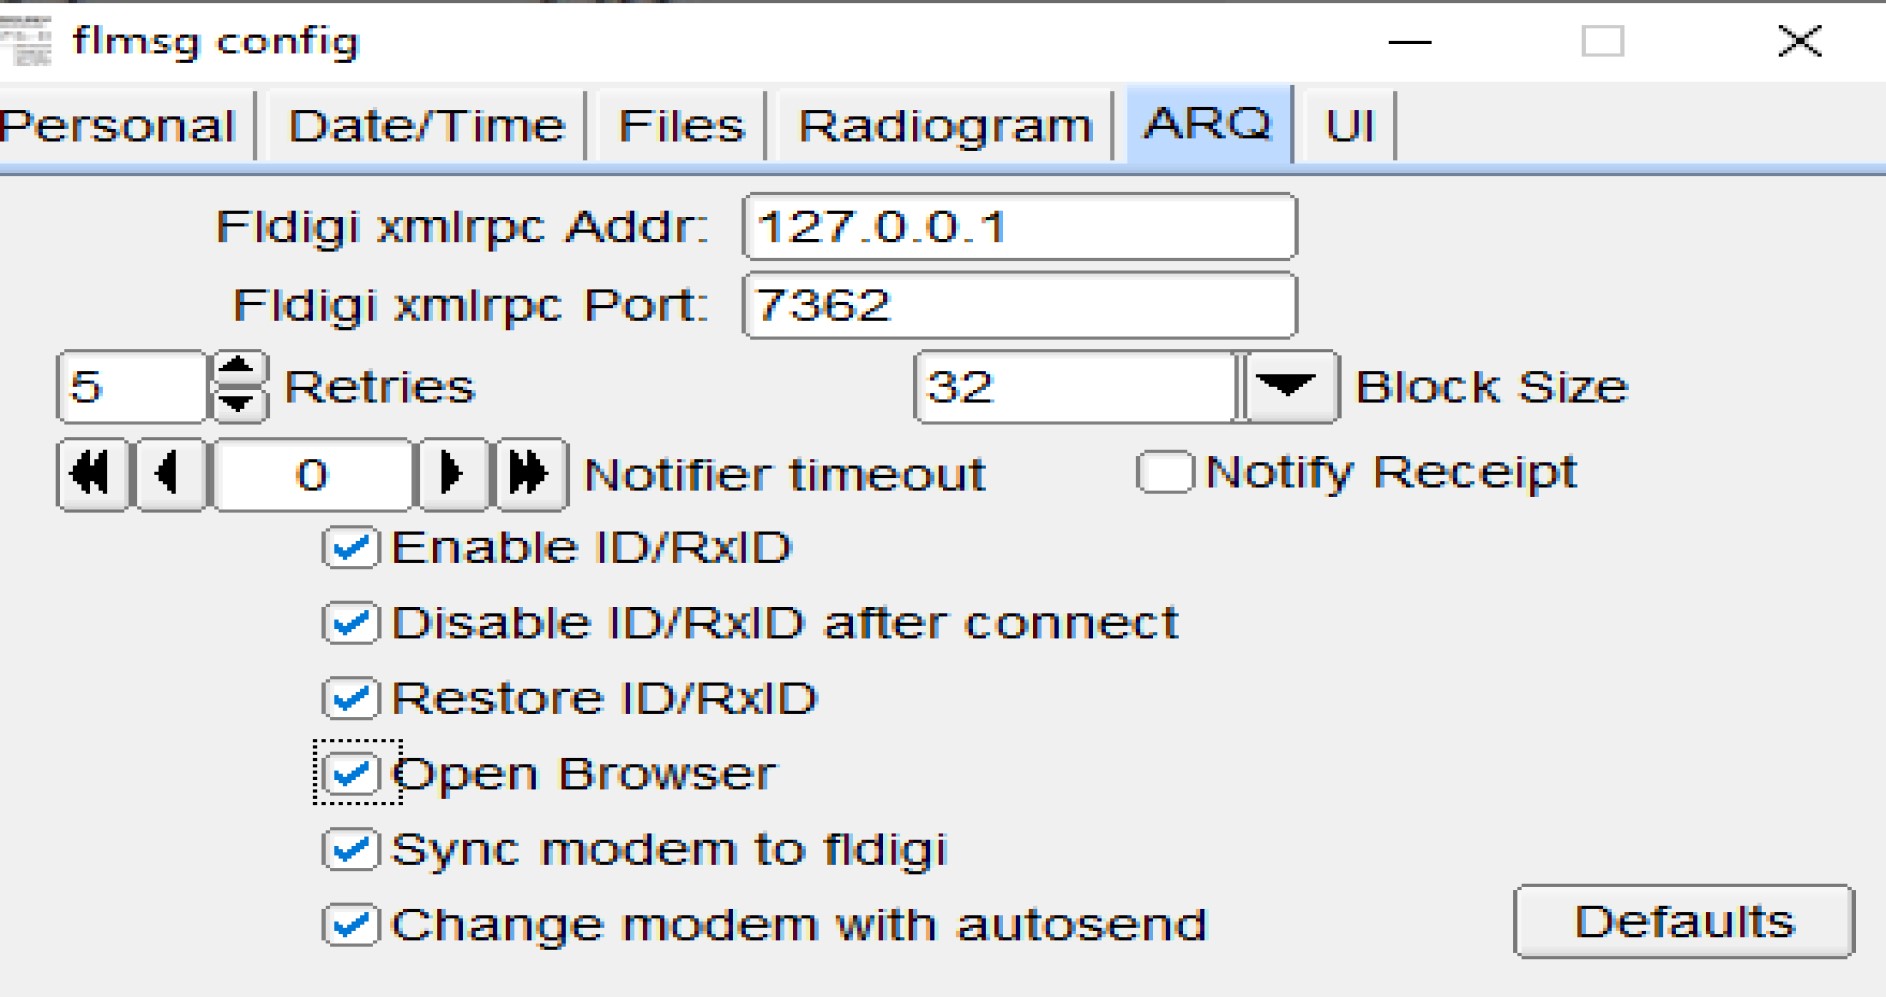
You can go through all of the tabs and set them to your preferences. Most of them I leave as defaults. Under the ARQ tab I prefer to also select the Open in browser and sync modem to fldigi. This will allow flmsg to have some control over fldigi when sending a message from flmsg.
After configuring these settings, click the X in the upper right corner. There is no save button. All these settings can be adjusted later if you need to.
Download Red Cross Forms
Flmsg comes with most of the forms already installed that we commonly use. It does not come with any of the Red Cross forms preinstalled. This is something that we use from time to time, and good practice to have it installed in case it is needed in the future. That way, you will not be trying to figure out how to get them when they are needed, possibly when the internet is down.
On the top bar of Flmsg select Forms, then go down to Red Cross, then click Download from Source Forge.

Once you click download from source forge, it will open in your web browser. At the time of writing this, it would not bring you directly to the forms so from there you will have to select Flmsg.
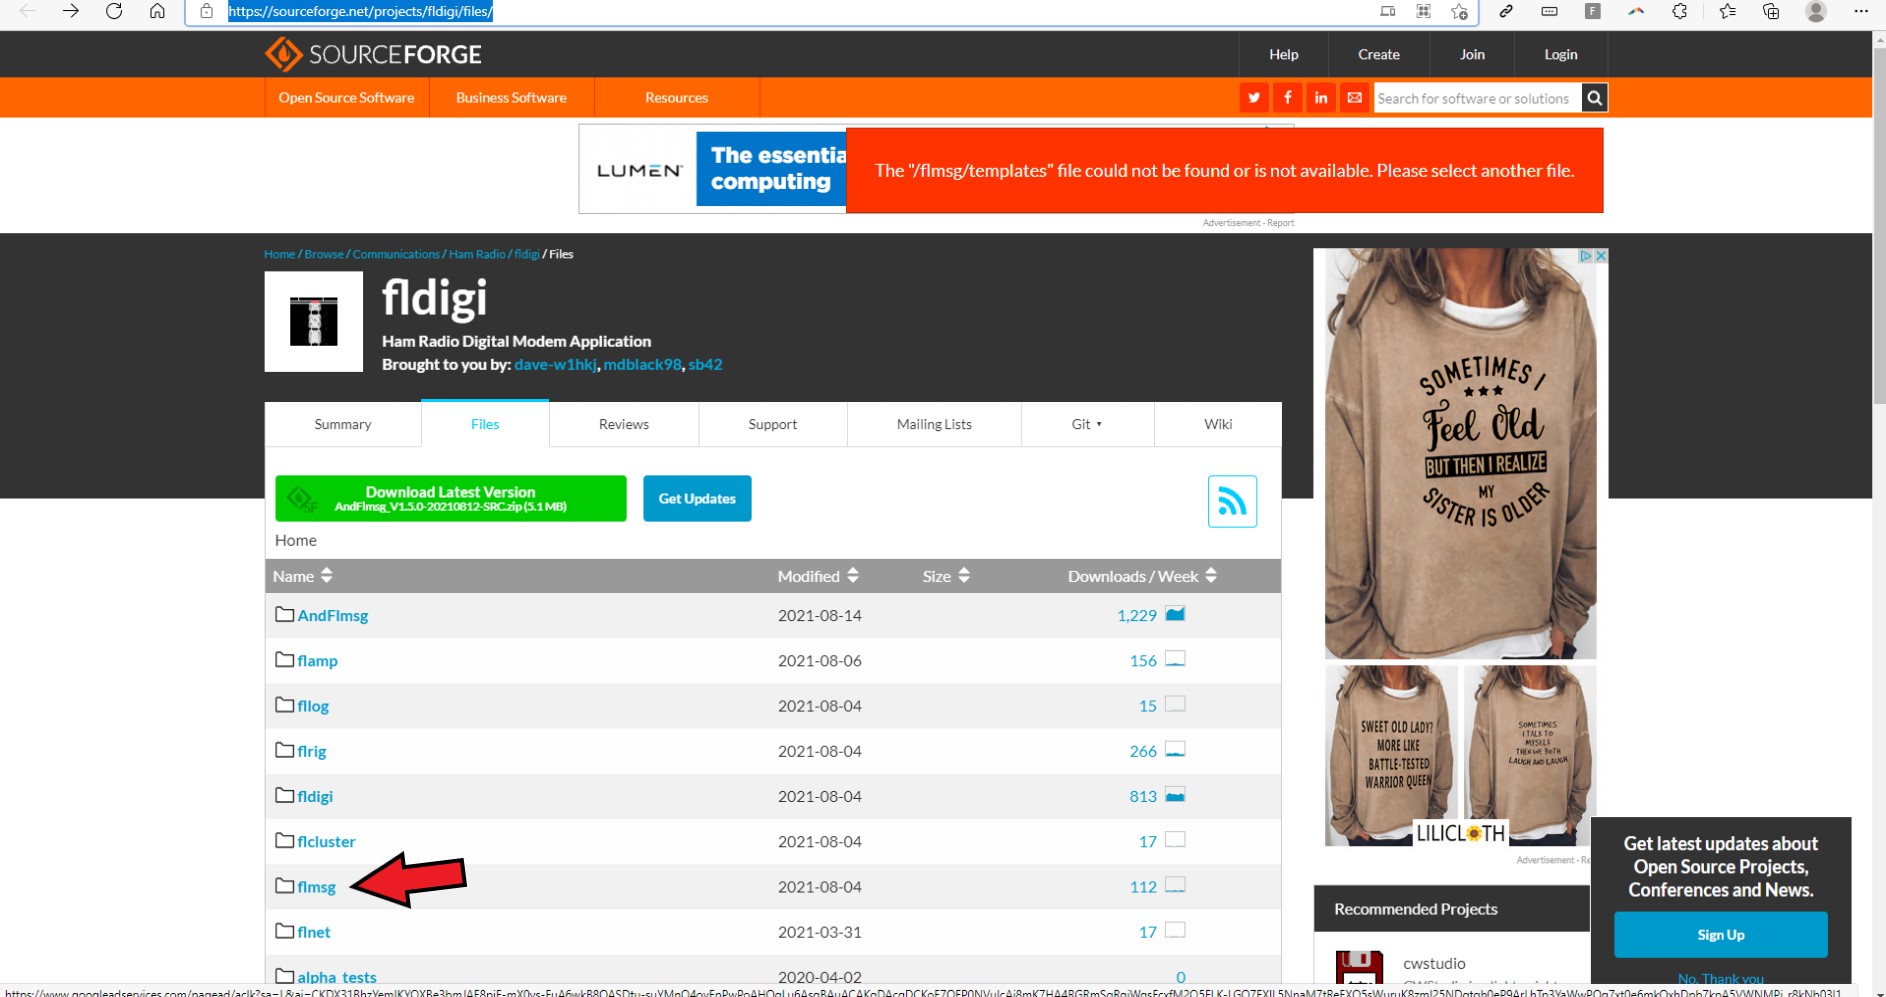
From that directory you will want to select ARC_Custom_forms. Thats what it is called at the time of writing this. If it changes let me know so I can update this page.
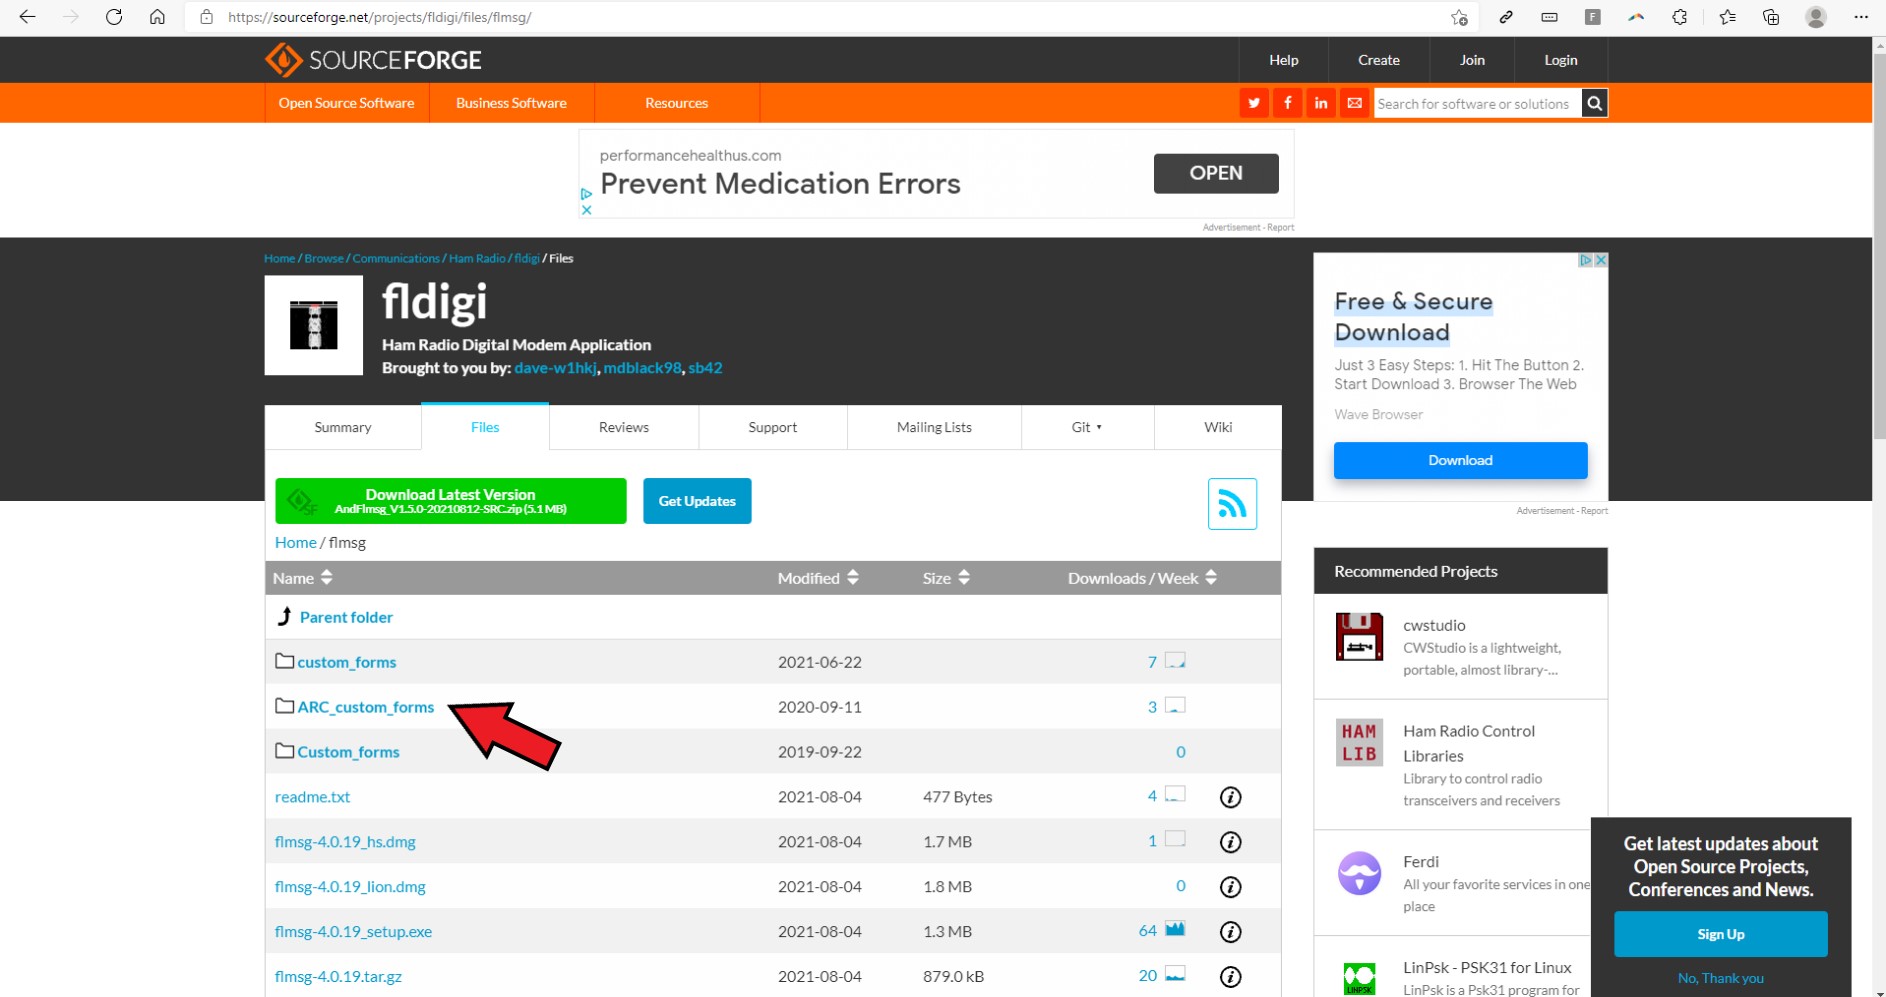
Once in the ARC_Custom_forms directory click the ARC_custom_forms.zip. This will download all of the Red Cross Forms.
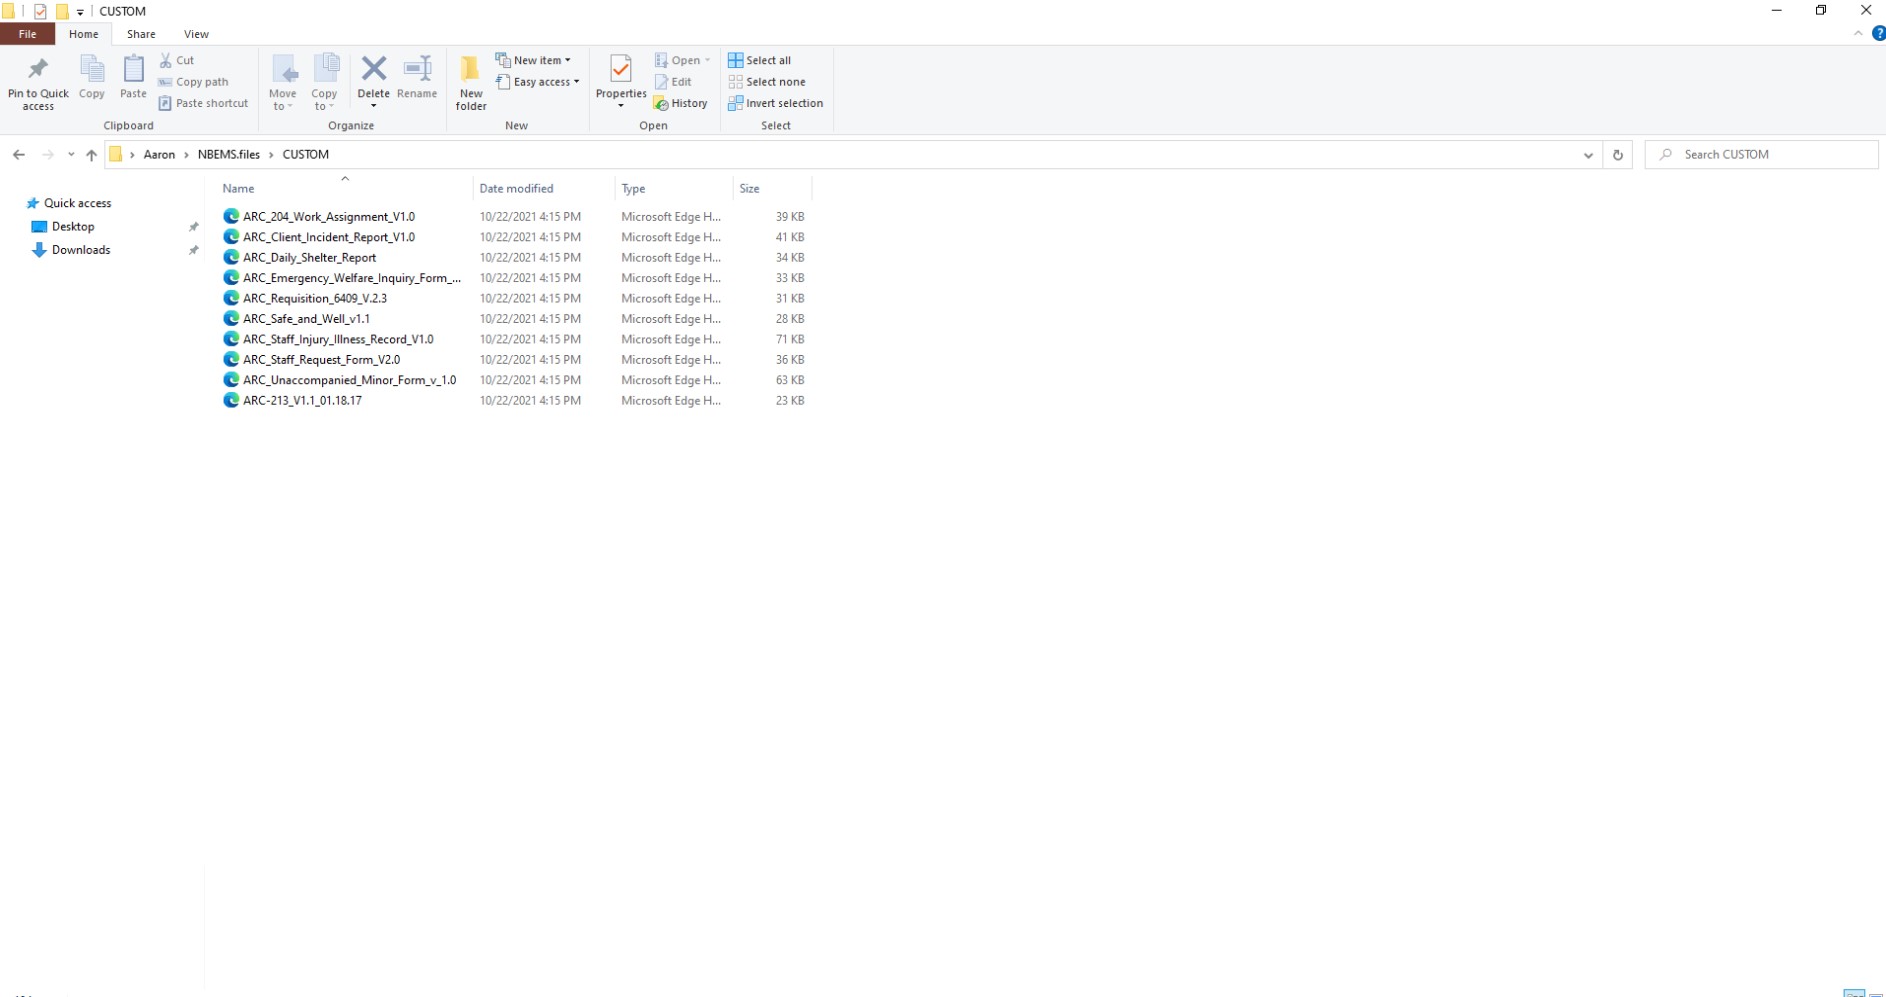
Once downloaded navigate to the place they were downloaded. In my case, the “download” directory of my computer. You will want to highlight all of the forms, right click and select copy.
Once you have them copied you need to navigate to the Nbems.files directory. This will be slightly different for everyone. For me it is in C:\Users\Aaron\NBEMS.files. Yours should be similar to this but instead of “Aaron” should be your user name

Once you find the NBEMS.files location, click CUSTOM to go into that directory. Once in the CUSTOM directory you need to right click and Paste all the forms there that you previously copied from your downloads.
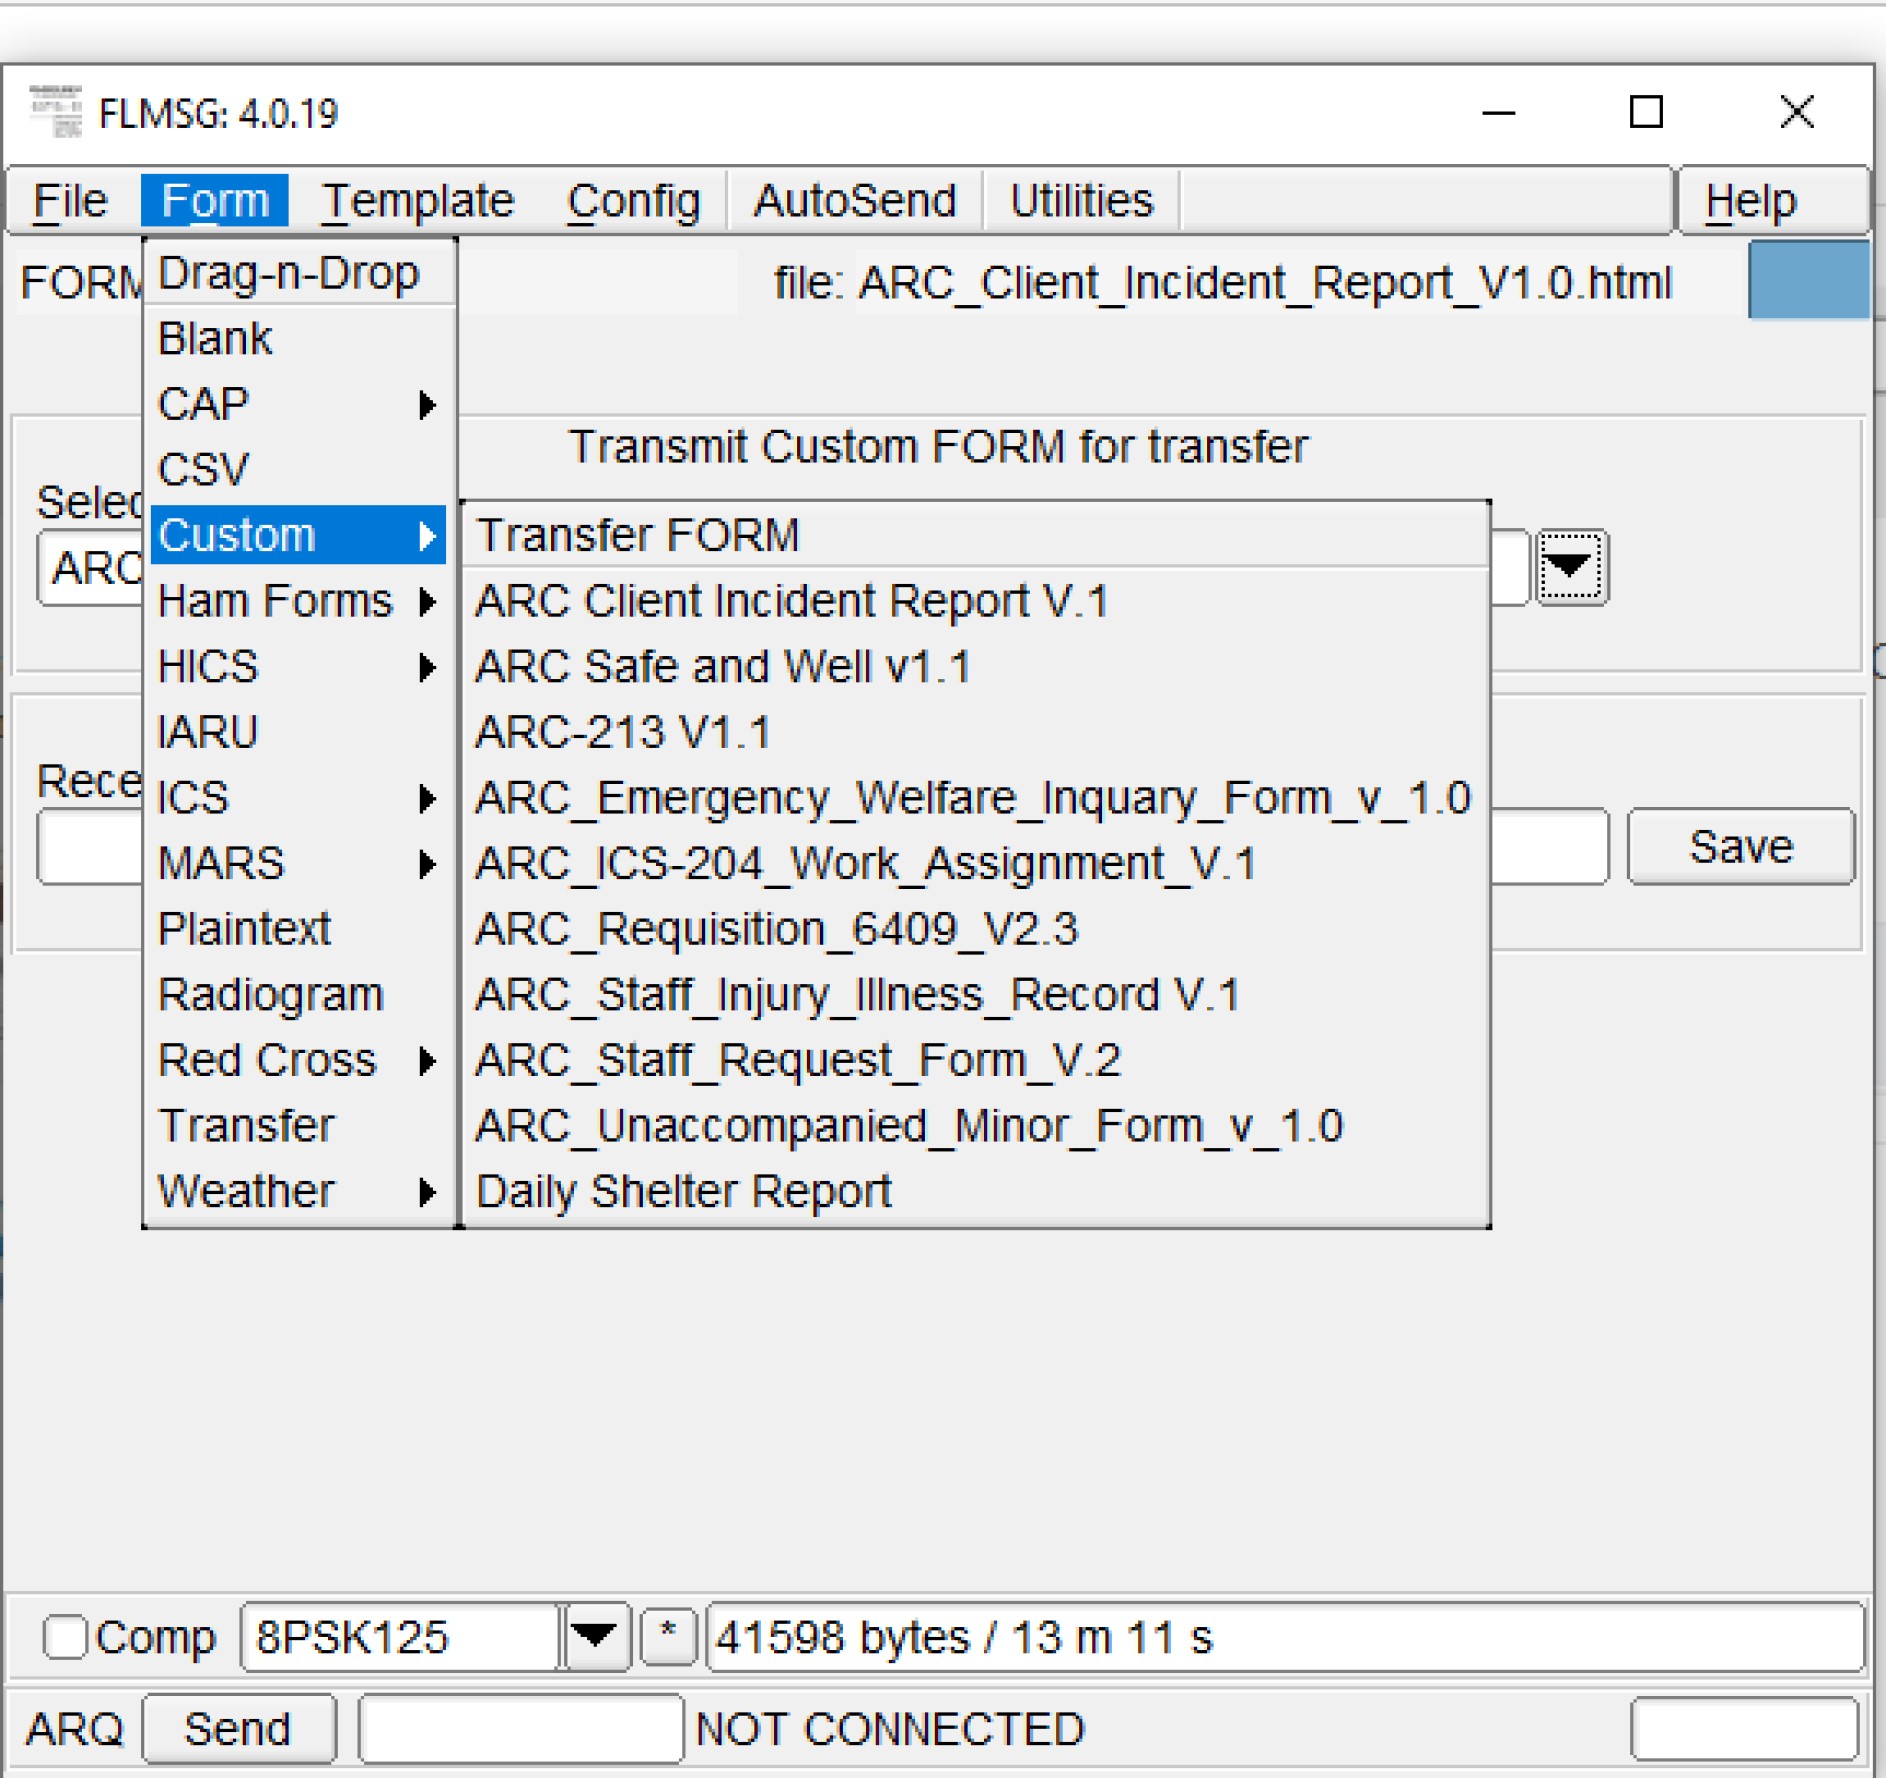
Thats it! You are done configuring flmsg for windows. To access the Red Cross forms, from Flmsg go to forms in the top bar then to custom and all of the Red Cross forms are there.